Homemade Sugar-Free Condensed Milk Recipe
Making your own condensed milk at home sounds like an impossible task, but I am thrilled to share with you a game-changing recipe that requires just three simple ingredients. This sugar-free version has completely transformed my baking and cooking experience, allowing me to enjoy my favorite desserts and treats without the guilt of excessive refined sugar. Whether you are diabetic, following a keto diet, or simply trying to reduce your sugar intake, this recipe is an absolute lifesaver that delivers the same creamy, rich texture you expect from traditional condensed milk.
What makes this recipe truly special is not just the minimal ingredient list, but the incredible versatility it offers. You can use this homemade sugar-free condensed milk in everything from coffee and tea to desserts, baking projects, and savory dishes. The best part is that it takes less than fifteen minutes to prepare, making it far more convenient than you might imagine. Once you master this simple technique, you will never want to buy store-bought condensed milk again, especially knowing exactly what goes into every batch you create.
Why You’ll Love This Recipe
This recipe stands out because of its incredible versatility. Unlike regular condensed milk that limits your options if you are watching your sugar intake, this version opens up endless possibilities. You can drizzle it over fresh berries, swirl it into yogurt, use it as a coffee creamer, or incorporate it into your favorite baking recipes. From traditional desserts to modern dietary preferences, this sugar-free condensed milk adapts to whatever your kitchen needs demand.
The nutritional benefits are undeniable, making this an intelligent choice for health-conscious home cooks. By eliminating refined sugar and using natural sweeteners instead, you avoid the blood sugar spikes associated with traditional condensed milk while still getting that luxurious creamy texture. The base ingredients are wholesome and recognizable, meaning you know exactly what you are consuming and feeding your family. This transparency in ingredients is something you simply cannot get with many commercial products.
The ease of preparation cannot be overstated. With just three ingredients and a simple mixing process that requires no special equipment beyond what you already have in your kitchen, anyone can master this recipe on their first attempt. There is no need for specialized cooking skills, expensive gadgets, or complicated techniques. This is approachable cooking at its finest, proving that homemade does not have to mean complicated or time-consuming.
Ingredients
- One 14-ounce can of full-fat coconut milk
- One-third cup of unsalted butter
- Half cup of monk fruit sweetener or erythritol
Step-by-Step Instructions
- Pour the full-fat coconut milk into a heavy-bottomed saucepan or small pot. Stir the coconut milk thoroughly to ensure the cream and liquid are well combined, as separation often occurs during storage. Place the pan over medium heat and allow the mixture to warm through, stirring occasionally.
- Add the unsalted butter to the warming coconut milk, cutting it into small cubes for faster melting. Stir continuously until the butter is completely melted and fully incorporated into the coconut milk, creating a smooth, homogeneous mixture. Keep the heat at medium to prevent any scorching on the bottom of the pan.
- Slowly add your chosen sweetener, whether monk fruit or erythritol, while stirring constantly to prevent lumps from forming. Continue stirring vigorously for one to two minutes to ensure the sweetener is completely dissolved and distributed evenly throughout the mixture. The condensed milk should now appear smooth and slightly thickened.
- Reduce the heat to medium-low and allow the mixture to simmer gently for eight to ten minutes, stirring occasionally. The condensed milk will thicken as it simmers and cools, reaching the desired consistency. Watch carefully to ensure the mixture does not boil vigorously, as this can cause separation.
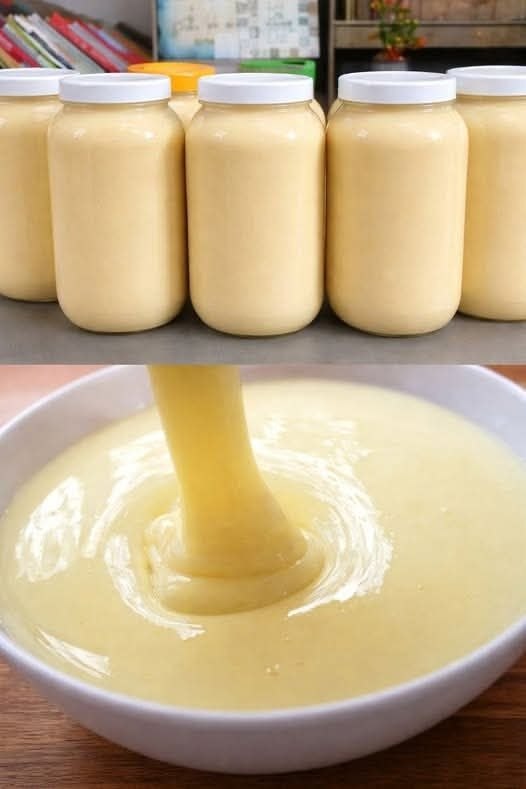
- Remove the pan from heat and allow the sugar-free condensed milk to cool to room temperature, which typically takes about fifteen to twenty minutes. The mixture will continue to thicken slightly as it cools, developing that classic condensed milk texture. Transfer to a sterilized glass jar for storage once completely cooled.
Expert Tips for Success
Temperature control is absolutely essential when making sugar-free condensed milk. Always use full-fat coconut milk rather than light versions, as the higher fat content creates the rich, creamy consistency that defines this product. Keep your heat at medium or lower to prevent the mixture from separating or developing a grainy texture. If you notice any separation occurring during cooking, simply remove the pan from heat and whisk vigorously until smooth, then continue with slightly lower heat.
The choice of sweetener significantly impacts both the flavor and texture of your final product. Monk fruit sweetener tends to provide a cleaner, more neutral taste that closely mimics the sweetness profile of traditional condensed milk. Erythritol works beautifully but may leave a slight cooling sensation on the palate for some people. Feel free to experiment with different sweeteners to find your personal preference, and remember that you can always adjust the sweetness level in future batches based on your first attempt.
Storage and shelf life are important considerations for your homemade condensed milk. Keep your finished product in a clean, airtight glass jar in the refrigerator where it will remain fresh for up to three weeks. For longer storage, you can freeze portions in ice cube trays for convenient single-serving measurements that thaw quickly when needed. Always use clean utensils when removing portions from the jar to prevent contamination and extend shelf life as long as possible.
Variations and Substitutions
- Vanilla Sugar-Free Condensed Milk: Add one-half teaspoon of pure vanilla extract to the finished mixture and stir well. This variation works beautifully in desserts, coffee beverages, and baking applications where vanilla complements other flavors.
- Salted Caramel Version: Replace regular butter with salted butter and add one-quarter teaspoon of sea salt during the final moments of cooking. This creates a luxurious salted caramel sweetness that elevates desserts and adds sophisticated flavor to chocolate-based recipes.
- Almond Milk Base: Substitute one cup of unsweetened almond milk combined with one-half cup of full-fat coconut milk for a lighter option with fewer calories. This variation works wonderfully for those with dairy sensitivities while maintaining excellent texture and consistency.
- Chocolate Sugar-Free Condensed Milk: Whisk in two tablespoons of unsweetened cocoa powder during the cooking process for a decadent chocolate version. This variation is perfect for creating homemade chocolate sauces, sweetening hot chocolate, and enriching chocolate desserts.
Serving Suggestions
Your homemade sugar-free condensed milk opens up a world of serving possibilities that extend far beyond traditional desserts. Drizzle it over fresh berries and whipped cream for an elegant dessert, mix it into your morning coffee for a creamy, indulgent breakfast beverage, or