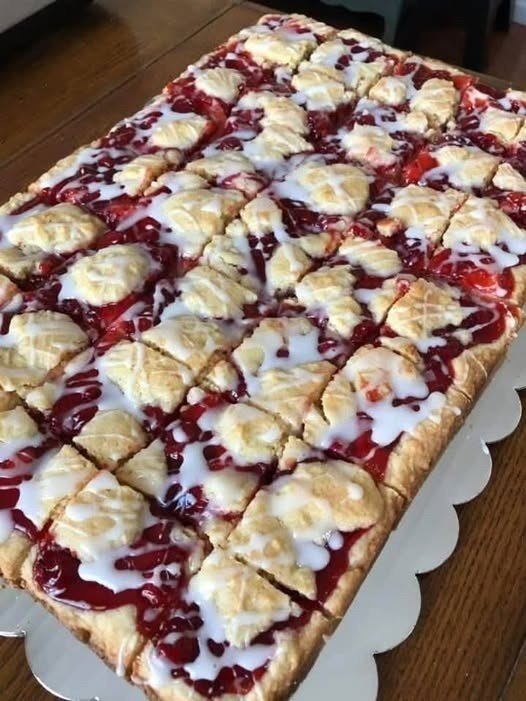
Cherry bars are an absolute crowd-pleaser that brings together the perfect balance of buttery shortbread, sweet cherry filling, and a tender crumb topping. Whether you’re preparing for a family gathering, potluck, church event, or outdoor celebration, these cherry bars deliver impressive homemade flavor with minimal fuss. The beauty of this recipe lies in its simplicity and scalability—you can easily double or triple the batch to feed a large group without any complicated techniques or specialty equipment required.
What makes cherry bars so special is their versatility across seasons and occasions. In summer, they’re a refreshing dessert that celebrates fresh seasonal fruit, while in winter, canned or frozen cherries work beautifully to bring bright cherry flavor to your table. The combination of textures—from the crispy crust to the jammy filling to the crumbly topping—creates a dessert that keeps people coming back for more. These bars are also incredibly practical for serving crowds because they can be made ahead, transported easily, and served at room temperature or chilled, making them perfect for any gathering scenario.
Why You’ll Love This Recipe
Cherry bars offer remarkable versatility that makes them suitable for nearly any occasion or dietary preference with minor modifications. The base recipe is naturally approachable for bakers of all skill levels, requiring only common pantry staples and straightforward mixing techniques. Whether you’re serving a gathering of five or fifty, you can adjust the recipe proportionally without worrying about baking time or temperature changes, since a full sheet pan cooks in the same timeframe as a nine-by-thirteen-inch baking dish.
From a nutritional perspective, cherry bars provide more than just delicious flavor. Cherries are rich in antioxidants and vitamin C, making these bars a slightly more wholesome indulgence compared to many other dessert options. You can further enhance the nutritional profile by using whole wheat flour, reducing sugar slightly, or incorporating oats into the topping. The combination of fruit and grain also provides adequate fiber, and when made with quality butter, these bars become a truly satisfying dessert that pairs well with coffee or milk.
The ease of preparation cannot be overstated. Unlike elaborate cakes or pastries requiring specialized decorating skills or equipment, cherry bars come together in about fifteen minutes of active preparation time. Most of the work involves mixing two simple components—the crust and topping—then spreading cherry filling between them and baking. This straightforward approach means less stress in the kitchen and more time enjoying your guests, plus the recipe yields enough servings from a single pan to feed a significant crowd without requiring multiple batches.
Ingredients
- 2 cups all-purpose flour
- 1 cup granulated sugar, divided
- 1 cup unsalted butter, softened
- 1/2 teaspoon salt
- 1 teaspoon vanilla extract
- 2 cups rolled oats
- 1 teaspoon baking powder
- 1/2 teaspoon ground cinnamon
- 3 cups cherry pie filling, canned or homemade
- 2 tablespoons fresh lemon juice
- 1/2 teaspoon almond extract, optional
- 2 tablespoons powdered sugar, for dusting optional
Step-by-Step Instructions
- Preheat your oven to 350 degrees Fahrenheit and line a 9×13-inch baking pan with parchment paper, leaving an overhang on two sides for easy removal. This preparation ensures your bars will not stick and creates a convenient way to lift them from the pan after baking.
- In a large mixing bowl, combine the softened butter with 3/4 cup of the granulated sugar, beating until the mixture becomes light and fluffy, approximately 2-3 minutes. Add the vanilla extract and mix until fully incorporated throughout the butter mixture.
- In a separate medium bowl, whisk together the flour, salt, baking powder, and cinnamon until evenly distributed. Gradually add the dry mixture to the wet ingredients, stirring until a crumbly dough forms with pea-sized pieces throughout.
- Stir the rolled oats into the dough mixture until they are evenly distributed and the texture resembles coarse breadcrumbs. Press approximately two-thirds of this mixture firmly into the bottom of the prepared baking pan, creating an even, compact layer.
- In a small bowl, gently stir together the cherry pie filling, lemon juice, and almond extract if using, ensuring the filling is well combined but still chunky. Spread the cherry mixture evenly across the crust layer, leaving approximately 1/2 inch space around the edges.
- Sprinkle the remaining oat crumb mixture over the cherry filling, distributing it evenly and patting down gently so it adheres to the filling below. Bake in the preheated oven for 35-40 minutes until the topping becomes golden brown and the filling begins to bubble slightly at the edges.
- Remove the pan from the oven and allow it to cool completely on a wire rack for at least 2 hours, or preferably 3-4 hours, before cutting into bars. The cooling time allows the filling to set properly, ensuring clean cuts and better structural integrity.
- Once completely cooled, use the parchment paper overhang to lift the entire sheet from the pan and place it on a cutting board. Cut into squares of desired size, wiping your knife between cuts with a damp cloth for cleaner, more attractive pieces.
Expert Tips for Success
The consistency of your cherry filling plays a crucial role in the final outcome of these bars. If you find that your canned cherry pie filling is overly thick, thin it slightly with a tablespoon or two of cherry juice or water before spreading onto the crust. Conversely, if your filling seems too liquidy, you can drain some of the liquid or add a tablespoon of cornstarch mixed with a tablespoon of water to thicken it. This careful attention to filling consistency ensures that your bars cut cleanly and hold together beautifully when serving to your crowd.
Temperature management extends beyond just the oven settings. Ensure your butter is genuinely softened to room temperature before beginning to cream it with sugar—cold butter will not incorporate properly and will result in an unevenly textured dough. Additionally, allowing your fully baked bars to cool completely at room temperature before refrigerating them helps set the filling and allows flavors to fully develop. Some bakers prefer to refrigerate the bars for a few hours or overnight before cutting and serving, which can make slicing even cleaner and create a more structured bar.
For serving large crowds, consider preparing your cherry bars the day before your event. These bars actually taste even better after sitting overnight as the flavors meld together and the texture becomes more cohesive. Store them in an airtight container at room temperature for up to three days, or wrapped individually in plastic wrap, which makes them convenient for guests to grab and enjoy. If you need to transport them to a gathering, keep them in the baking pan covered with foil, then cut and plate them upon arrival for the freshest presentation.
Variations and Substitutions
- Blueberry or raspberry bars can be made by substituting the cherry filling with your preferred berry pie filling, adjusting the lemon juice slightly based on the tartness of your chosen berry.
- Create a peach-cherry blend by mixing two cups of cherry pie filling with one cup of peach pie filling for a more complex, layered fruit